纯记录安装步骤,供研究使用,日常工作建议使用VmWare VirtualBox HyperV等
qemu版本
λ qemu-system-x86_64 -version
QEMU emulator version 6.2.0 (v6.2.0-11889-g5b72bf03f5-dirty)
Copyright (c) 2003-2021 Fabrice Bellard and the QEMU Project developers
1 下载windows 10安装 ISO文件 Win10_1909_English_x64.iso
2 下载Qemu中设备的virtio驱动,可以用于加速设备的模拟,提升虚拟机运行速度
到下面的网址找一个最新版本下载,我用的是virtio-win-0.1.215.iso
https://fedorapeople.org/groups/virt/virtio-win/direct-downloads/archive-virtio/
https://fedorapeople.org/groups/virt/virtio-win/direct-downloads/archive-virtio/virtio-win-0.1.215-2/virtio-win-0.1.215.iso
3 创建磁盘
qemu-img create -f qcow2 hdd.img 40G4 启动虚拟机进行安装
这里使用了 whpx 加速,适合安装并启用了hyper-v的机器,也可以使用intel的haxm来加速,下载地址在下面,haxm与hyper-v不兼容,启用了hyper-v就不能使用haxm了,根据机器选一个
https://github.com/intel/haxm命令
qemu-system-x86_64.exe -accel whpx -machine q35 -smp sockets=1,cores=1,threads=2 -m 2048 -usb -device usb-kbd -device usb-tablet -rtc base=localtime -net nic,model=virtio -drive file=1909.img,media=disk,if=virtio -drive file=Win10_1909_English_x64.iso,media=cdrom -drive file=virtio-win-0.1.215.iso,media=cdrom qemu中无法直接得知whpx是否正常启用,不过如果看到qemu输出包含这一行,一般whpx就正常启用了,还可以是应用process explorer等工具查看 WinHvPlatform.dll是否正常加载
Windows Hypervisor Platform accelerator is operational当然,就算正常加载了,后面还可以报错,甚至影响功能,比如后面的savevm命令就不能使用
有时候可能会看到这一行(whpx貌似已经正常进行加速了,目前不知这个报错会影响哪些)
(qemu) whpx: injection failed, MSI (0, 0) delivery: 0, dest_mode: 0, trigger mode: 0, vector: 0, lost (c0350005)这时候可以加一个参数kernel-irqchip=off来去除这个报错(当然也不能解决savevm无法使用的问题)
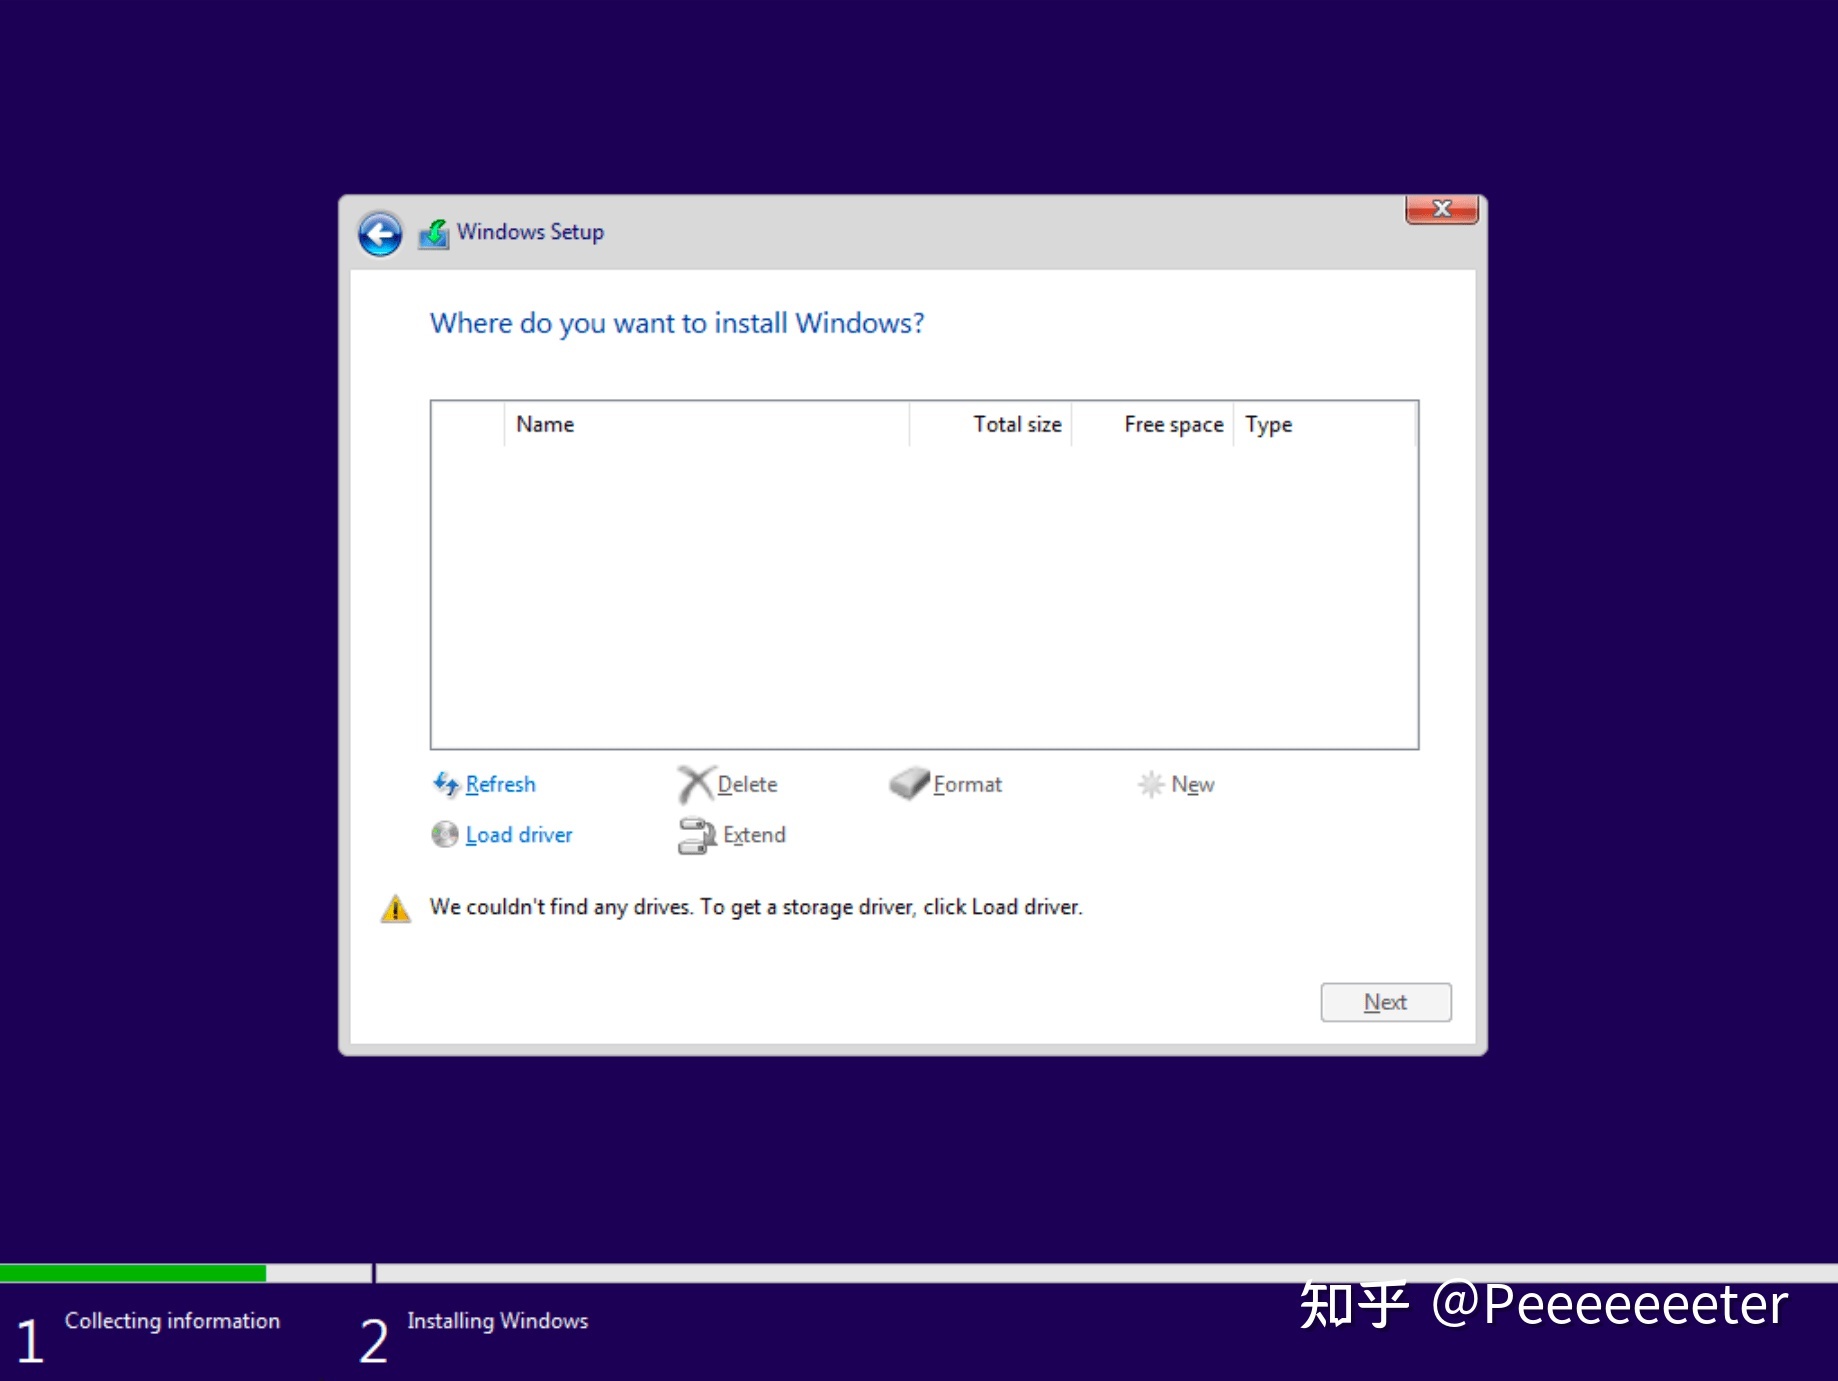
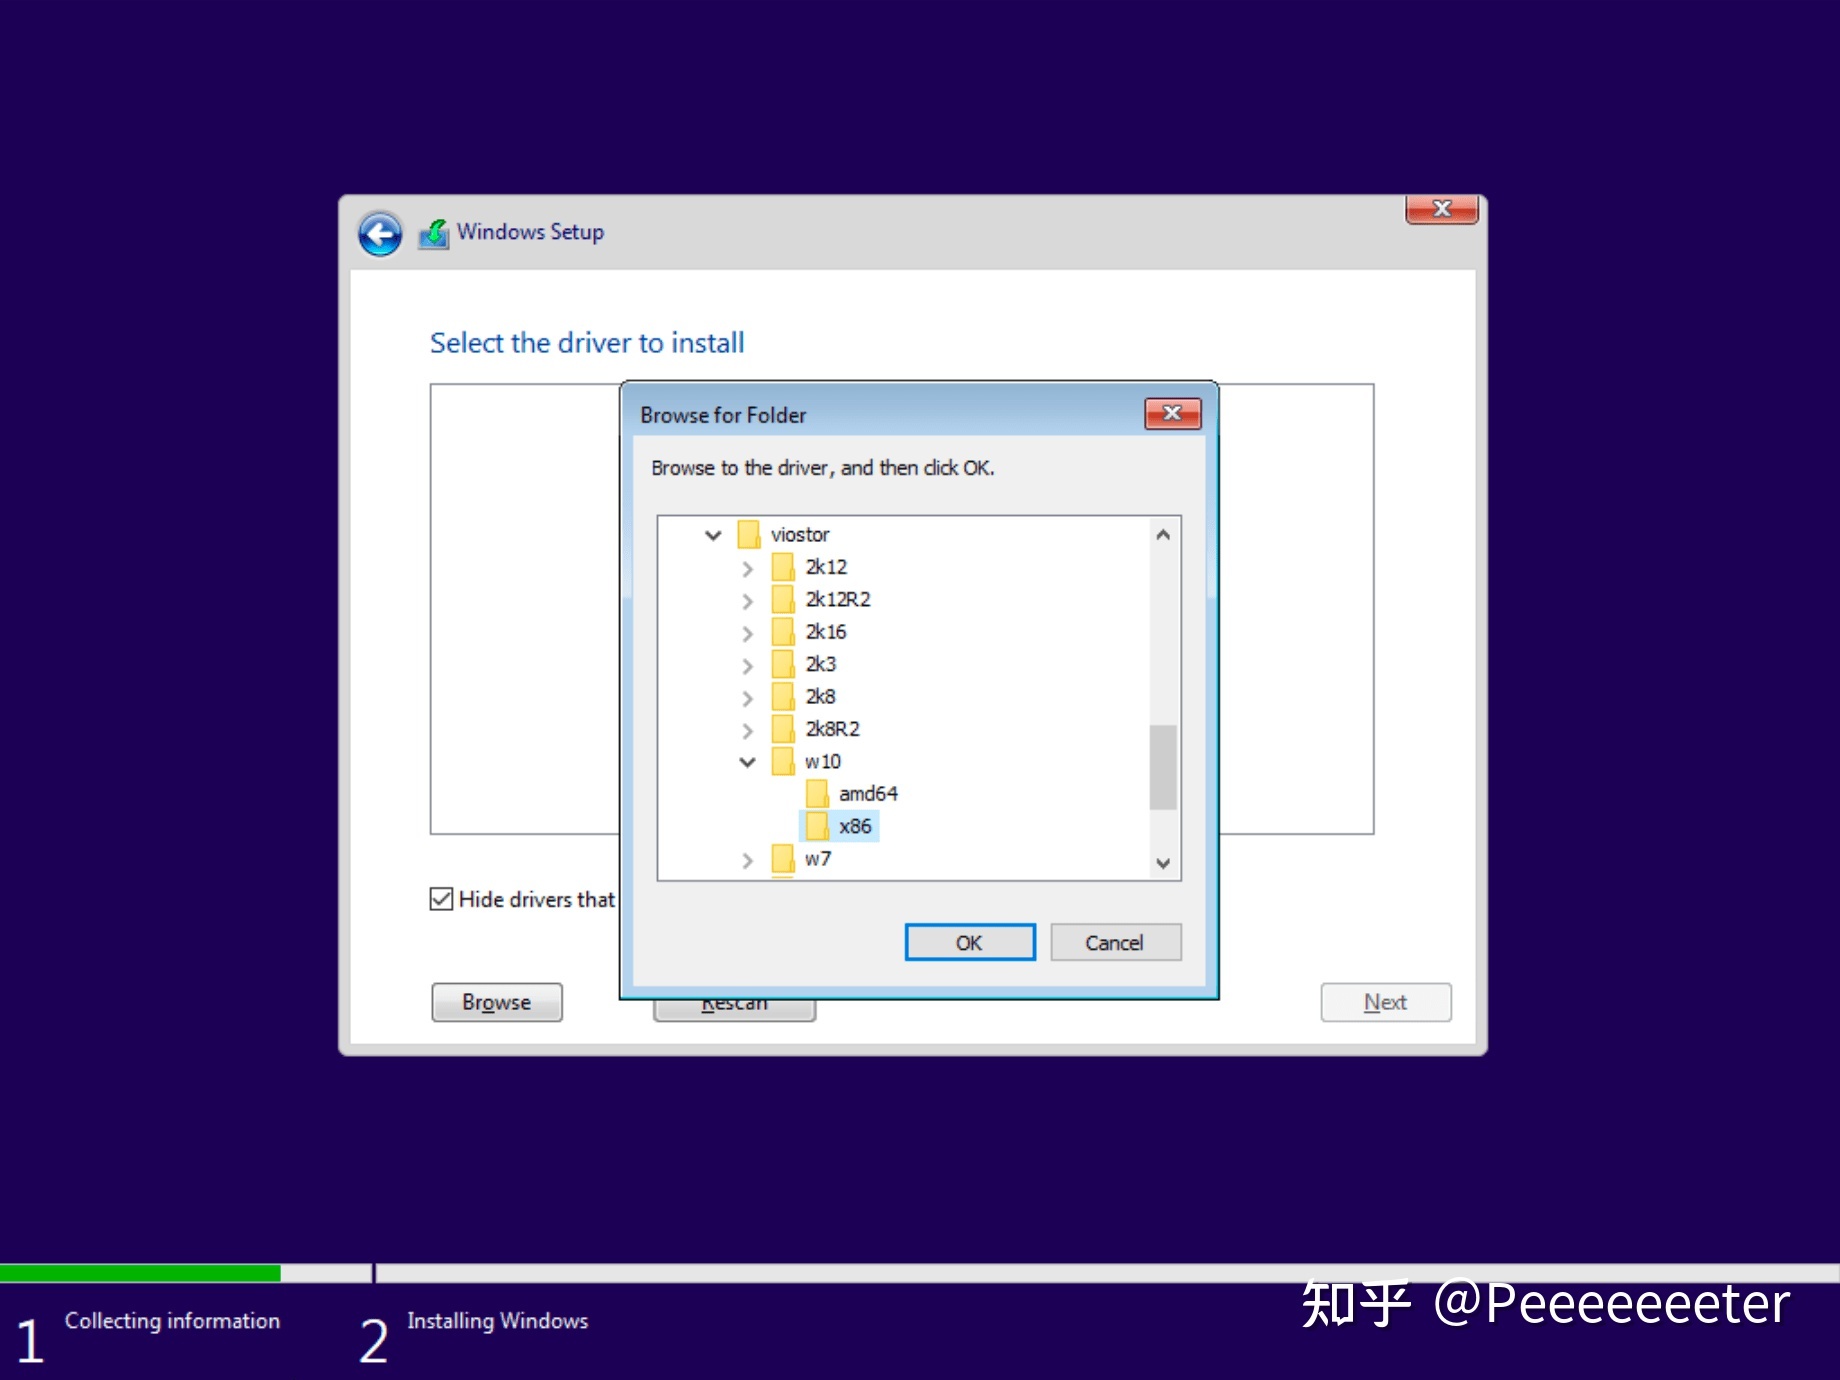
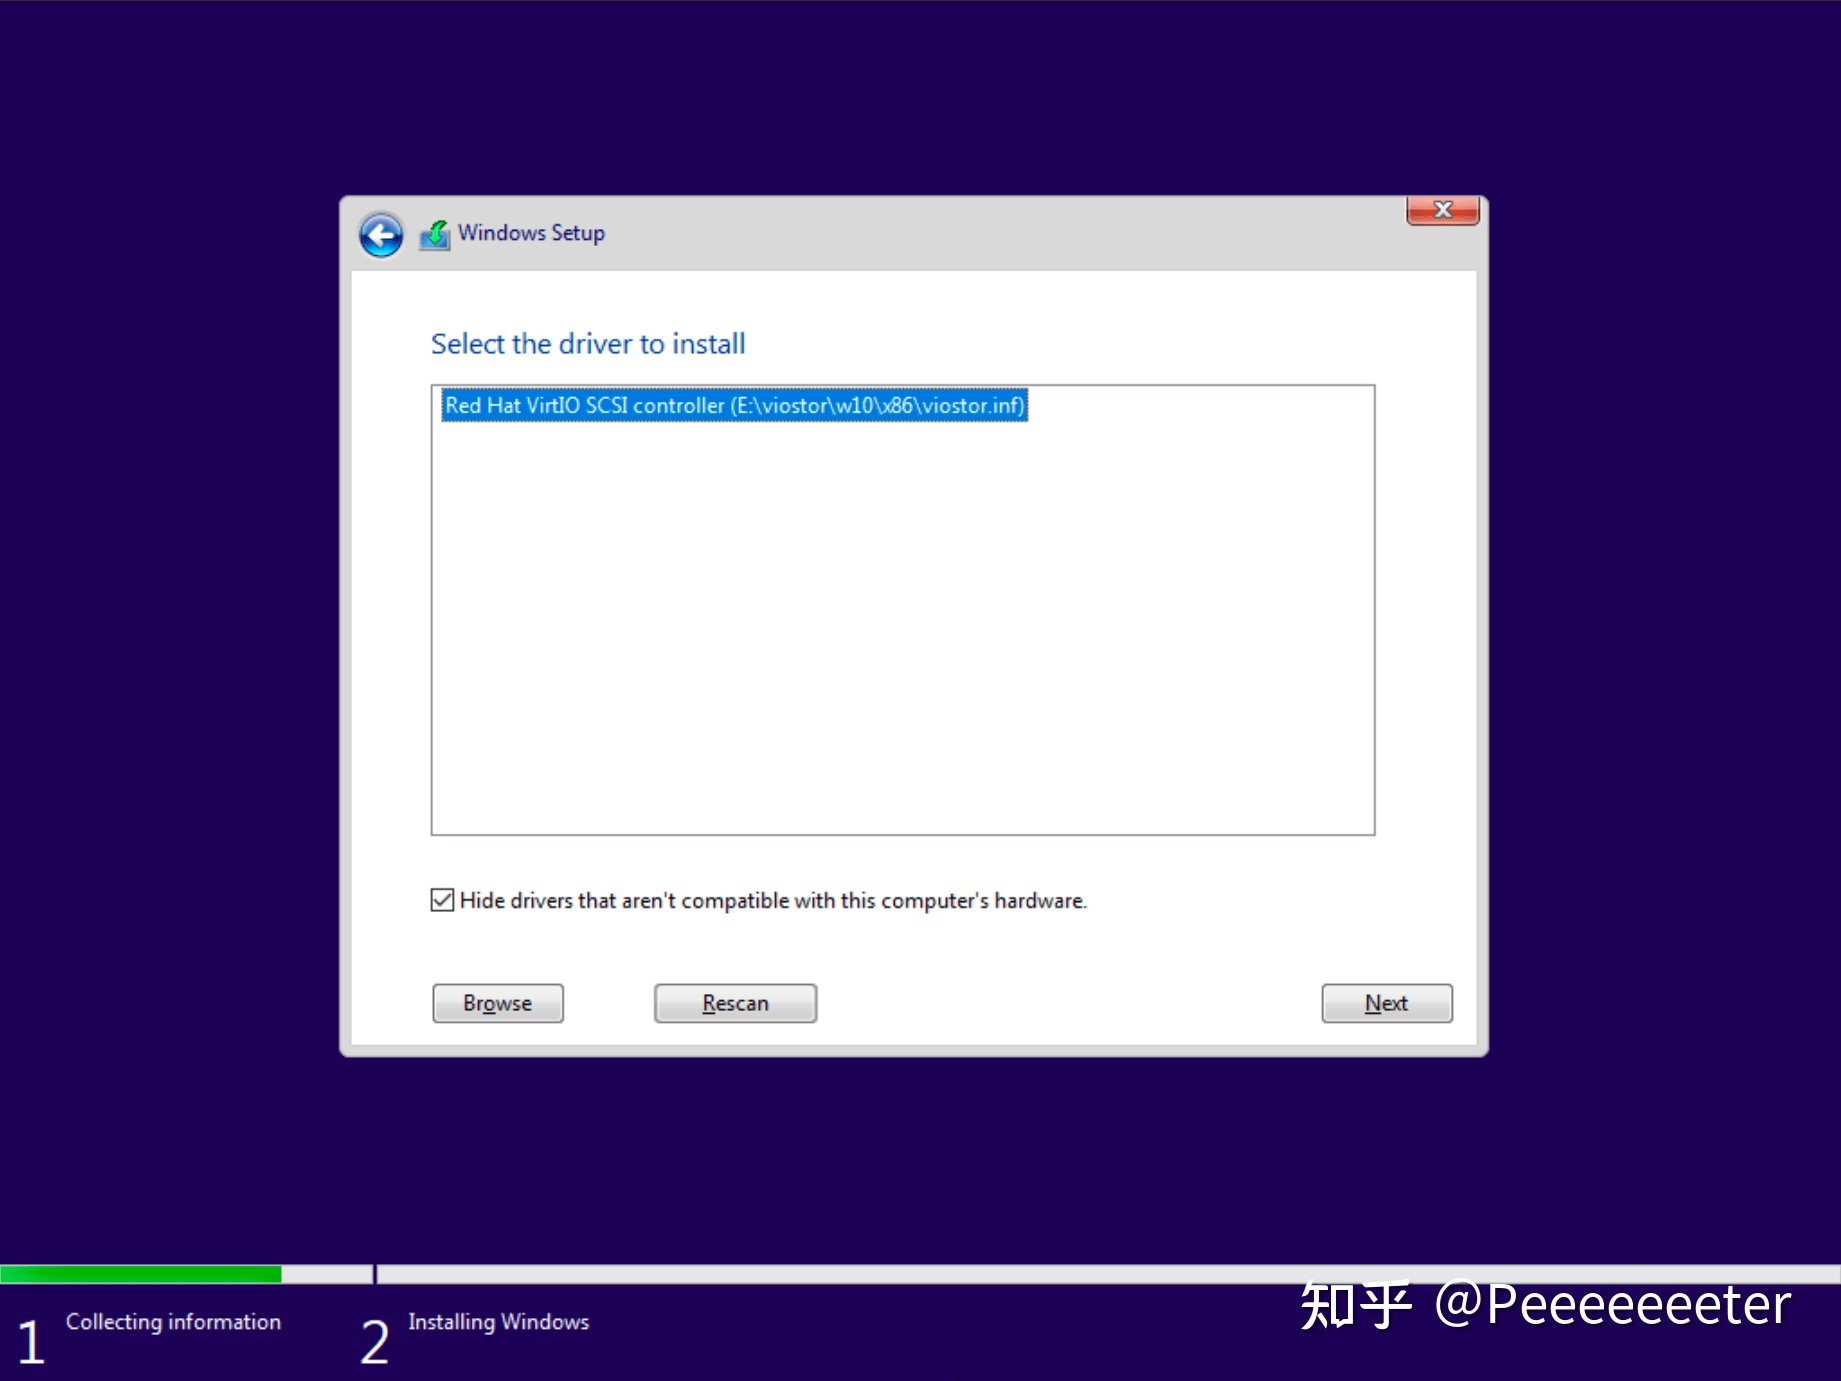
qemu-system-x86_64 -accel whpx,kernel-irqchip=off -machine ....5 然后就是正常的windows安装步骤,值得注意的是下面一步,如果到了分区那一步找不到磁盘,需要点击下面的 Load Driver,找到下载的iso里的 viostor 目录里 w10\amd64 子目录里查找并安装驱动,然后就可以了正常分区
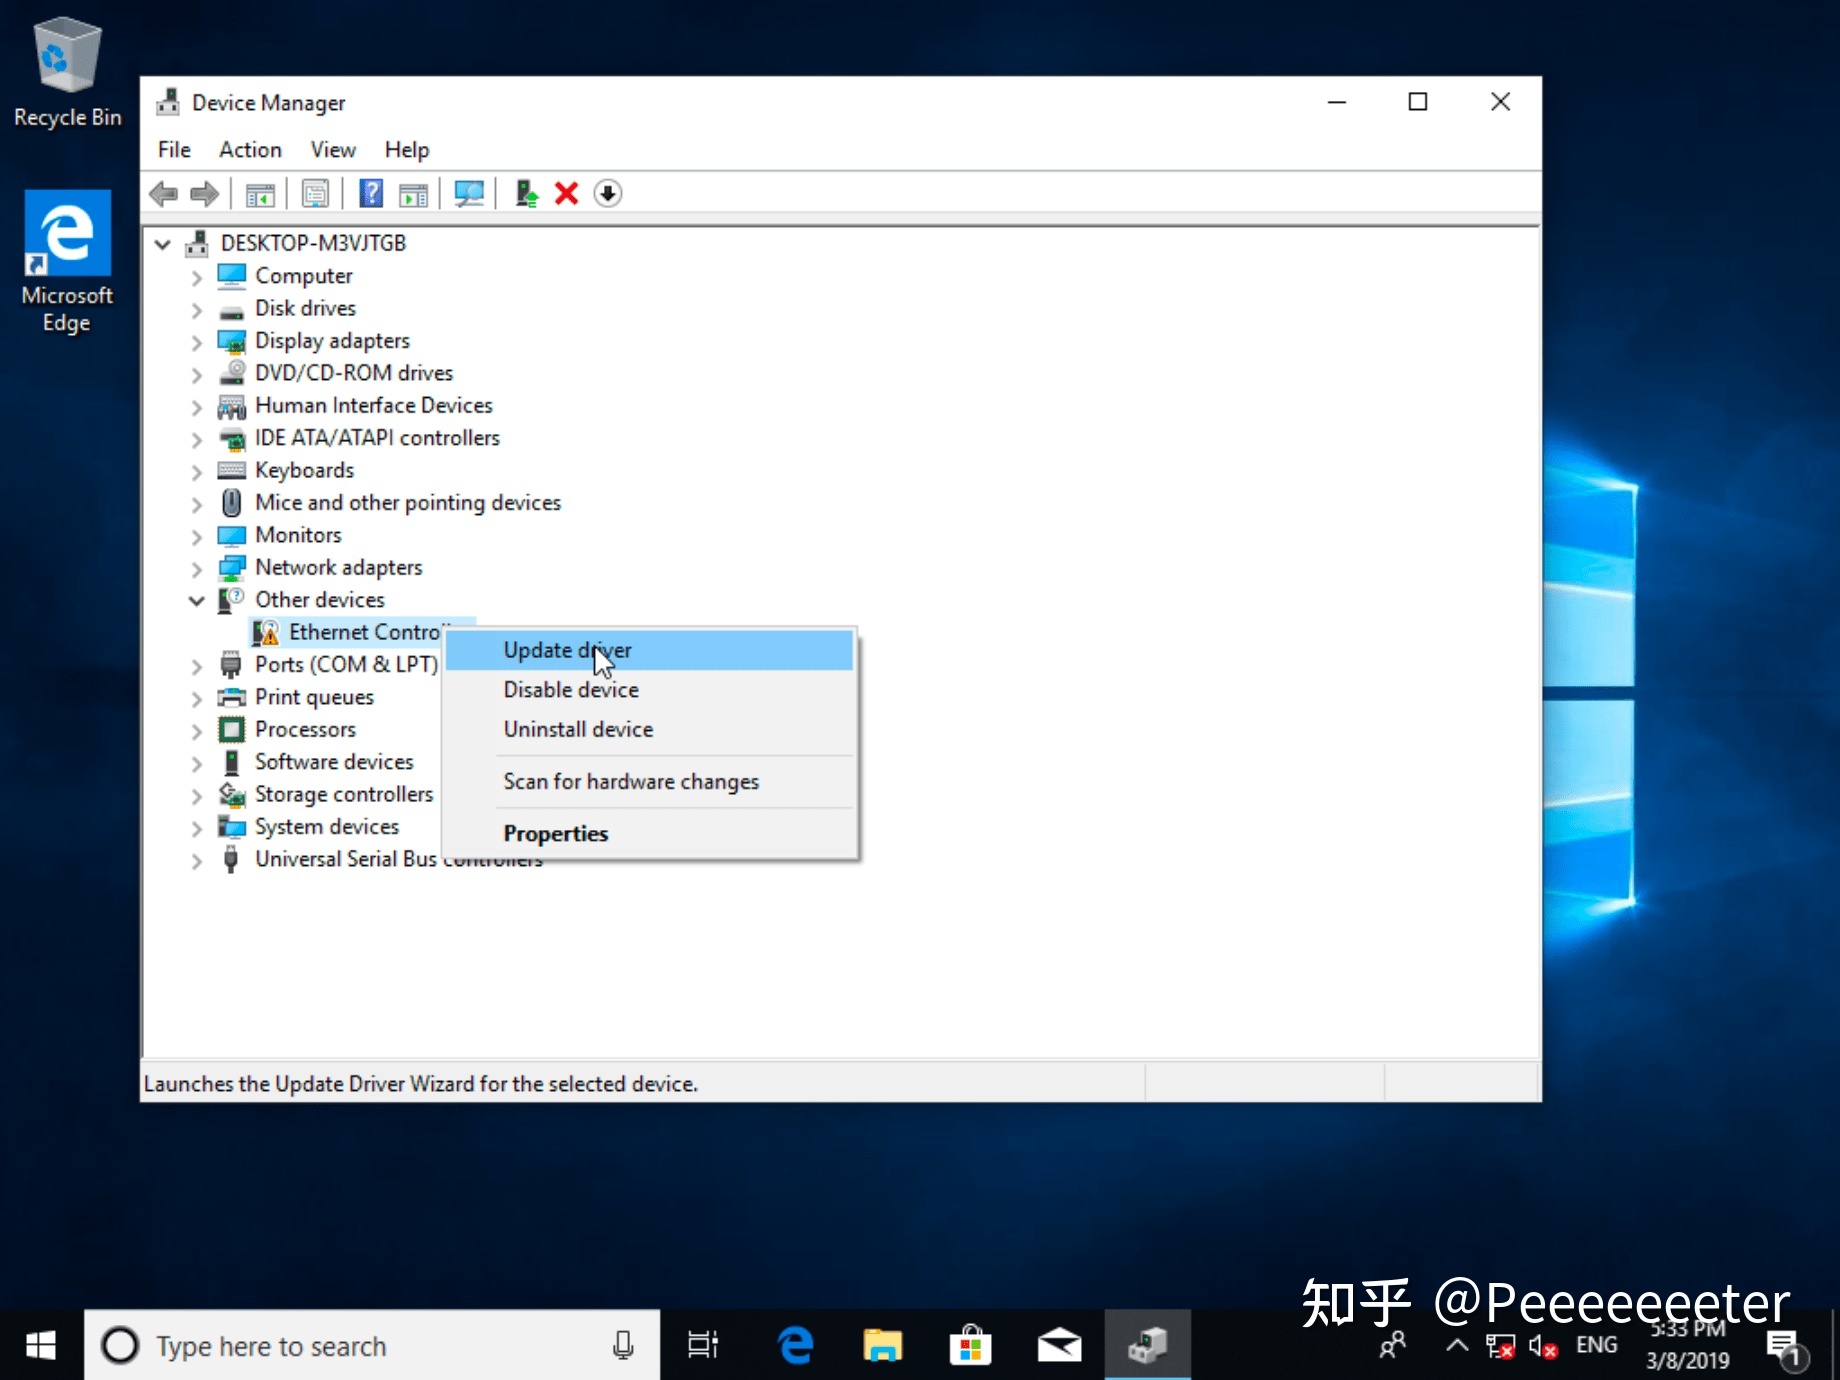
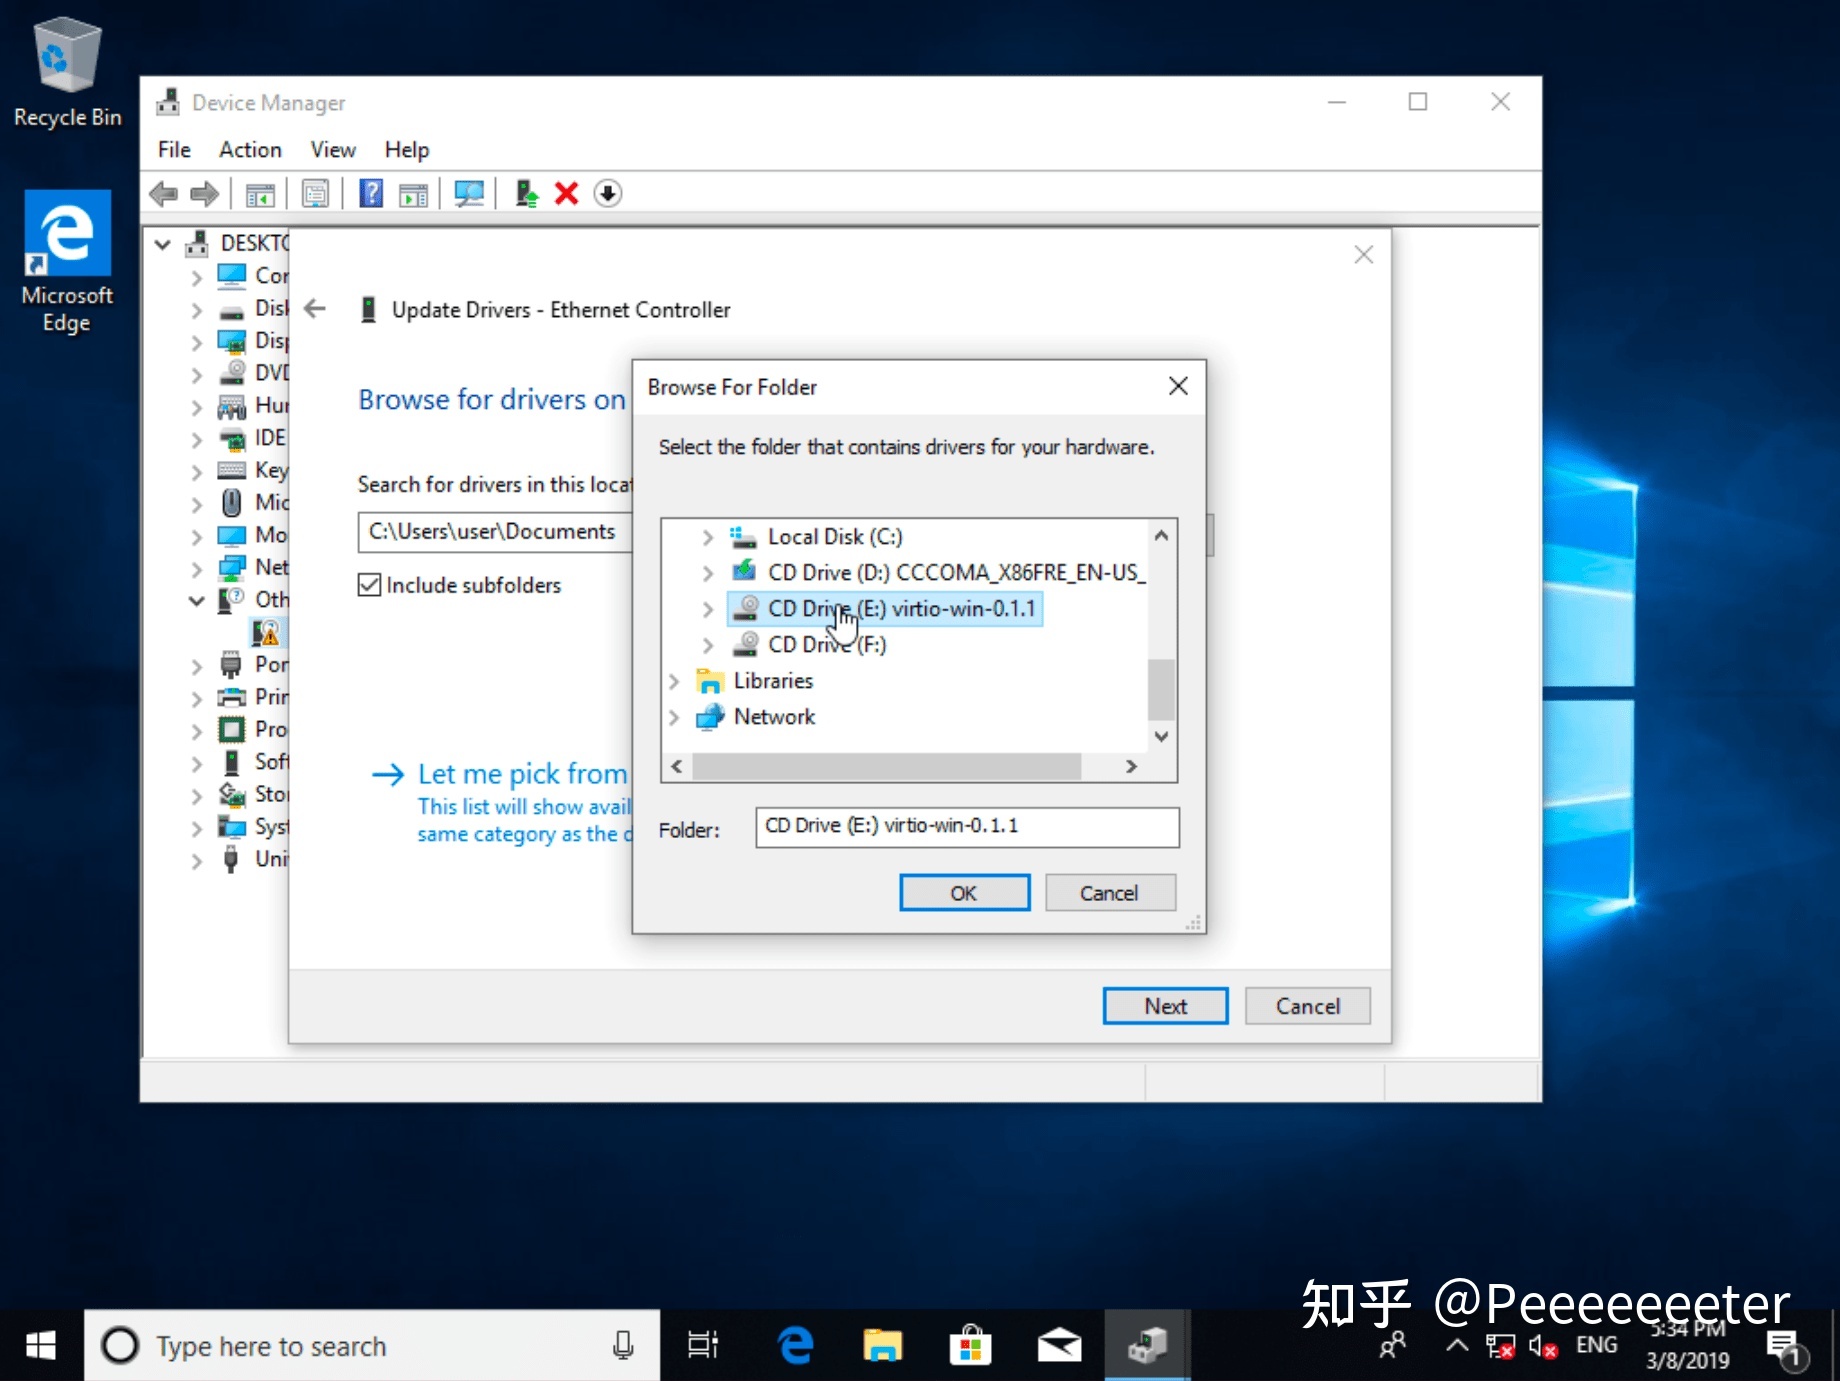
6 安装完windows之后,需要安装网卡驱动才能上网,打开设备管理器,点击update driver,选择驱动盘,会自动找到驱动并安装
7 继续安装驱动盘里的驱动,一个是 qemu-ga-x86_64.msi,一个是qemu guest agent,virtio-win-guest-tools.exe
8 安装spice webdavd,以便进行文件传输,暂时省略
可以参考
Sharing a folder a windows guest under virt-manager
How to share folder with Windows 10 guest using virt-manager (KVM)?
9 建立内存快照,以便将一些更改操作放在快照里,后面可以方便切换或者迅速恢复设置
9.1 关闭虚拟机
9.2 建立快照磁盘
$ qemu-img create -b hdd.img -F qcow2 -f qcow2 snapshot.img9.3 启动虚拟机
qemu-system-x86_64 -accel whpx -machine q35 -smp sockets=1,cores=1,threads=2 -m 2048 -usb -device usb-kbd -device usb-tablet -rtc base=localtime -net nic,model=virtio -drive file=snapshot.img,media=disk,if=virtio -monitor stdio9.4 进行一些设置或者操作
9.5 在monitor窗口或者stdio中保存快照 ,然后退出
注意/待解决:可能由于whpx的bug,导致无法保存快照,如果是kvm hax tcg可能不存在这个问题
(qemu)savevm windows
(qemu)quit
10 从快照中启动虚拟机
qemu-system-x86_64 -accel whpx -machine q35 -smp sockets=1,cores=1,threads=2 -m 2048 -usb -device usb-kbd -device usb-tablet -rtc base=localtime -net nic,model=virtio file=snapshot.img,media=disk,if=virtio -loadvm windows11 可以将上面的操作结果放到docker里
$ mv hdd.img snapshot.img image
$ cd image
$ docker build -t windows/test .
refer
1 https://pve.proxmox.com/wiki/Windows_VirtIO_Drivers
2 https://github.com/aerokube/windows-images
3 https://www.qemu.org/docs/master/system/invocation.html?highlight=kernel-irqchip
4 https://www.digitalfoundations.com.au/blog/qemu-5-on-windows-host-with-whpx/
5 https://qemu-project.gitlab.io/qemu/system/monitor.html
6 https://github.com/qemu/qemu/blob/master/docs/system/images.rst
福利
xemu是一款基于qemu的xbox模拟器,可以玩xbox优秀,xemu: Original Xbox Emulator
必须 注册 为本站用户, 登录 后才可以发表评论!