1. Some basic rules:
– 25 euro only for AX and auction
– EX and other servers cost EXTRA.
– The server needs to be fresh/unused.
– Sometimes it takes more time then other times, please wait until I finish or ask questions about the server.
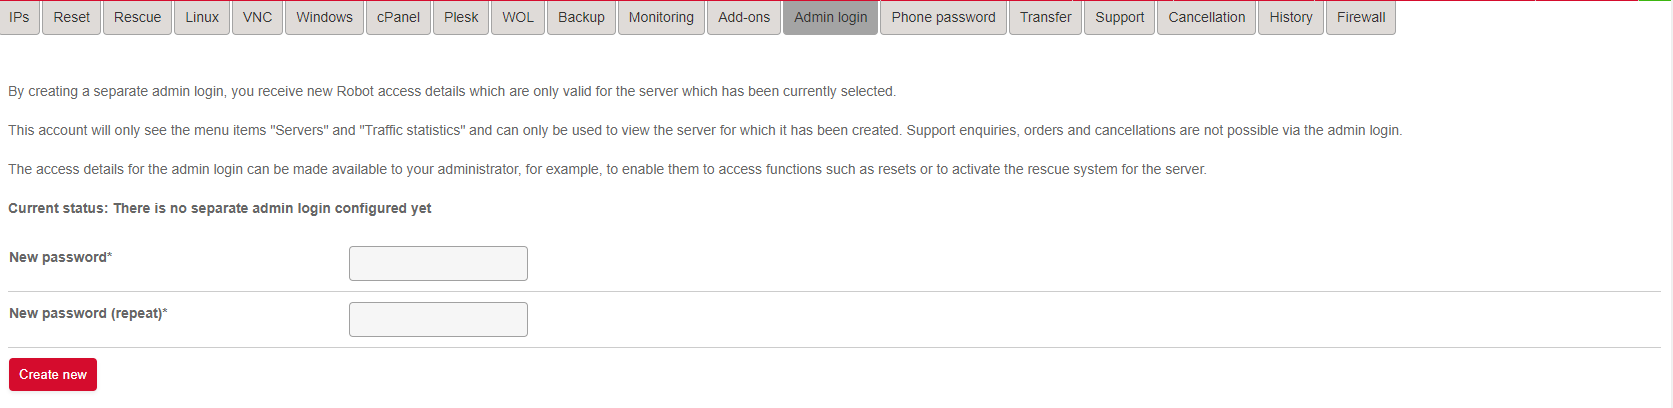
– Please make an ADMIN LOGIN (Follow the guide).
– Windows installs as MBR, it will only install on 2TB or less disks, later you can make the disks GPT with a program.
2. Services I provide?
or you provide a link with your own .iso if you please.
– Proxmox installation with a seperate network inside.
so you can have more VM’s on the server on Hyper1.
– Windows Server has Hyper2.
Please watch YouTube if you want to know the difference.
3. How to get banned/blocked?
– Be rude
– Asking too many free advices.
This is a hobby, but my time shouldn’t be free for consulting.
Let’s START!
Introduction
IMPORTANT:
DON’T ORDER WITH iNIC!
No connection possible!
Welcome to this tutorial of how to install any windows to a dedicated server.
I bought a server on https://hetzner.de on the auction and after only 10 minutes I got the login details! I will explain now simply how to install any Windows you want to this dedicated server! (Took me over 10 hours with trial and error, but I hope you can do it within 20 minutes!)
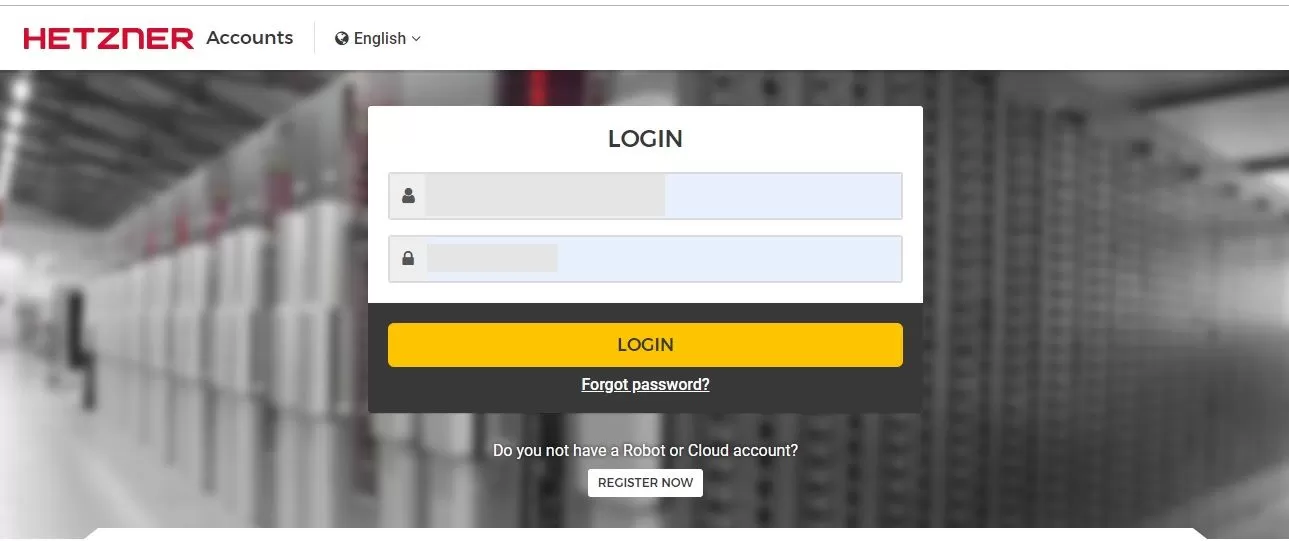
Open the email of “Hetzner Login”.
Login at Hetzner
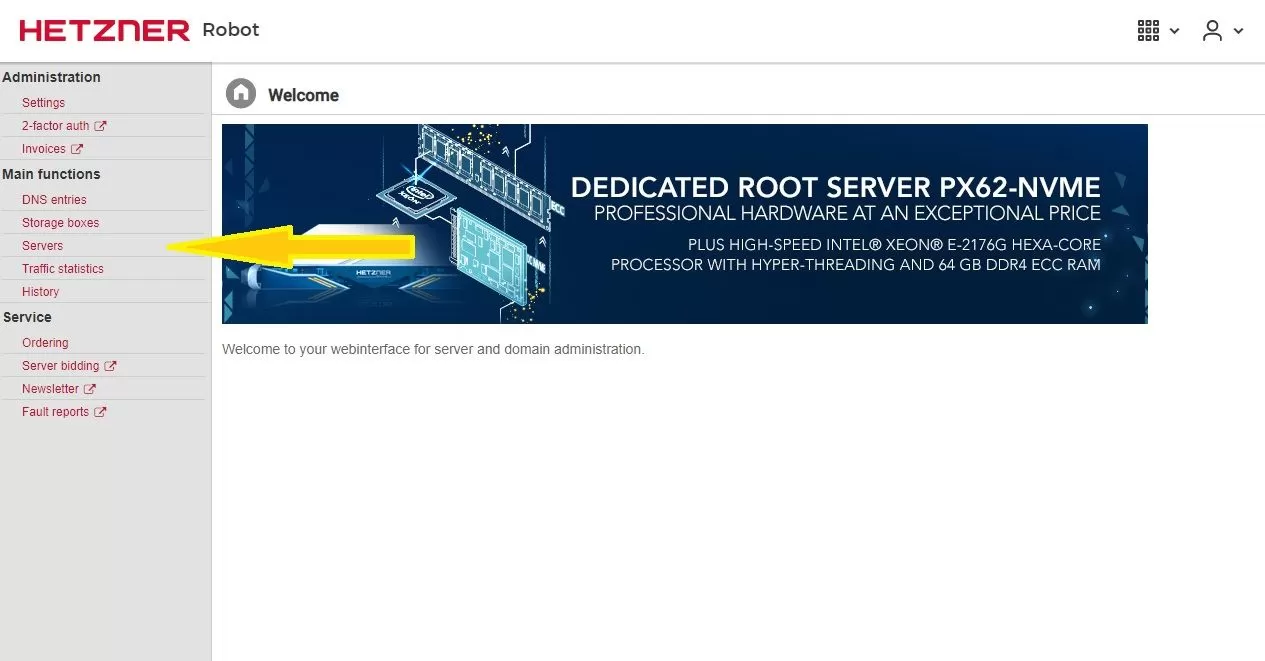
Go to ‘Robot’.

Go to ‘Servers’.
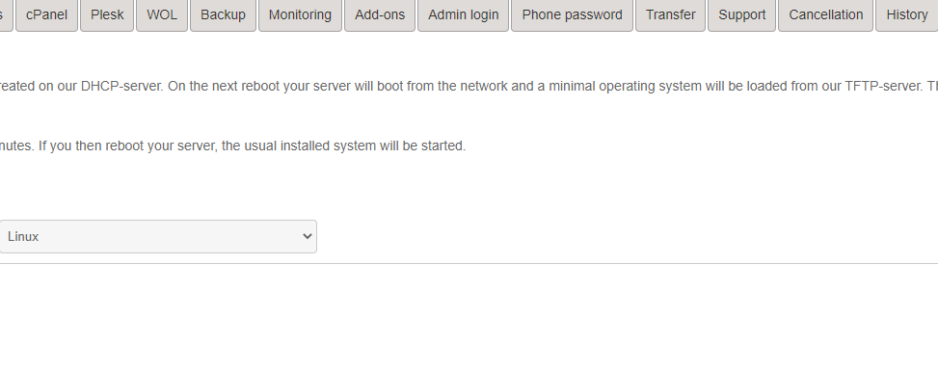
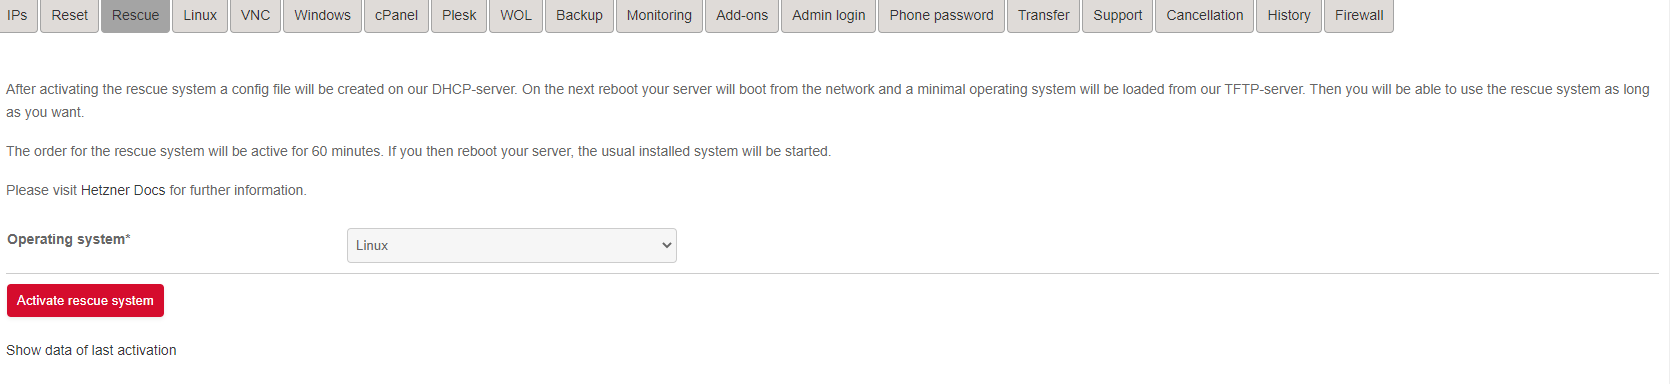
Go to ‘Rescue’
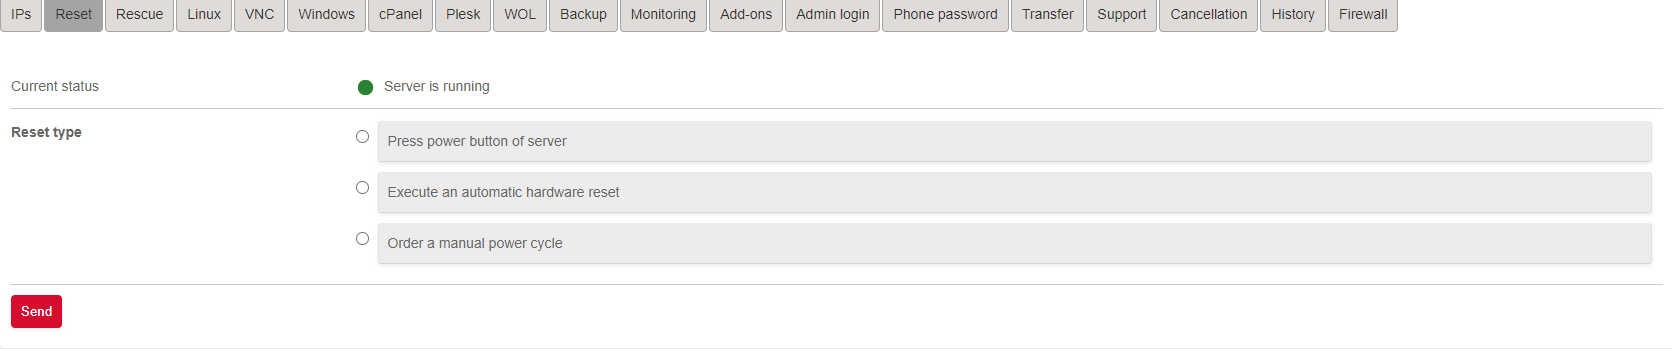
Go to ‘Reset’.
Execute an automatic hardware reset.
Go back to ‘Rescue’.
Install by me >
We need some software to connect to the server:
🔽 Download PuTTY
https://www.chiark.greenend.org.uk/~sgtatham/putty/latest.html
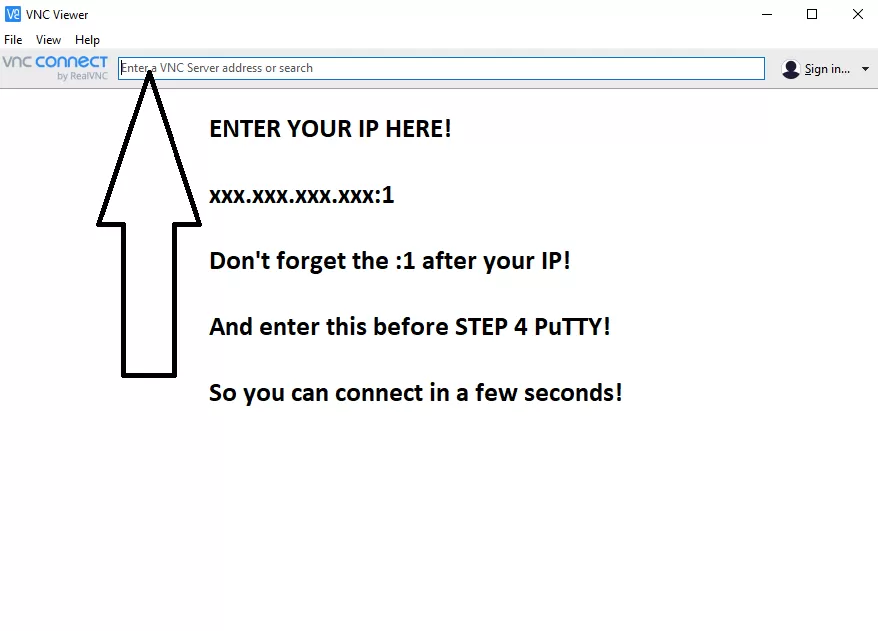
🔽 Download a VNC Viewer
https://www.realvnc.com/en/connect/download/viewer/
🔽 Check any Windows version you want to use!
I recommend https://www.microsoft.com/en-us/cloud-platform/windows-server-trial
PuTTY step 00.
LEAVE PuTTY OPEN UNTIL EVERYTHING ELSE IS FINISHED!
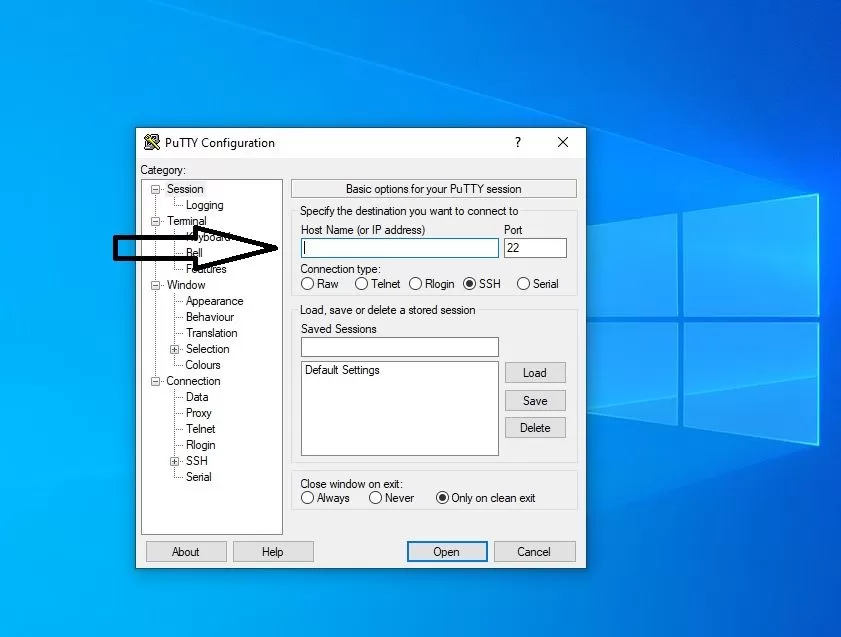
PuTTY step 01.
Copy the line and paste with right mouse button in the terminal.
wget -qO- /tmp https://abcvg.ovh/uploads/need/vkvm-latest.tar.gz | tar xvz -C /tmp
PuTTY step 02.
cd /tmp
PuTTY step 03.
– Windows Server 2019 evaluation 180 days
wget https://software-download.microsoft.com/download/pr/17763.737.190906-2324.rs5_release_svc_refresh_SERVER_EVAL_x64FRE_en-us_1.iso
– Windows Server 2022 evaluation 180 days
wget https://software-download.microsoft.com/download/sg/20348.169.210806-2348.fe_release_svc_refresh_SERVER_EVAL_x64FRE_en-us.iso
– Windows 10 Enterprise evaluation 90 days
wget https://software-download.microsoft.com/download/sg/17763.107.101029-1455.rs5_release_svc_refresh_CLIENT_LTSC_EVAL_x64FRE_en-us.iso
wget https://www.itechtics.com/?dl_id=140
– Windows 10 PRO 22H2
Before you continue!
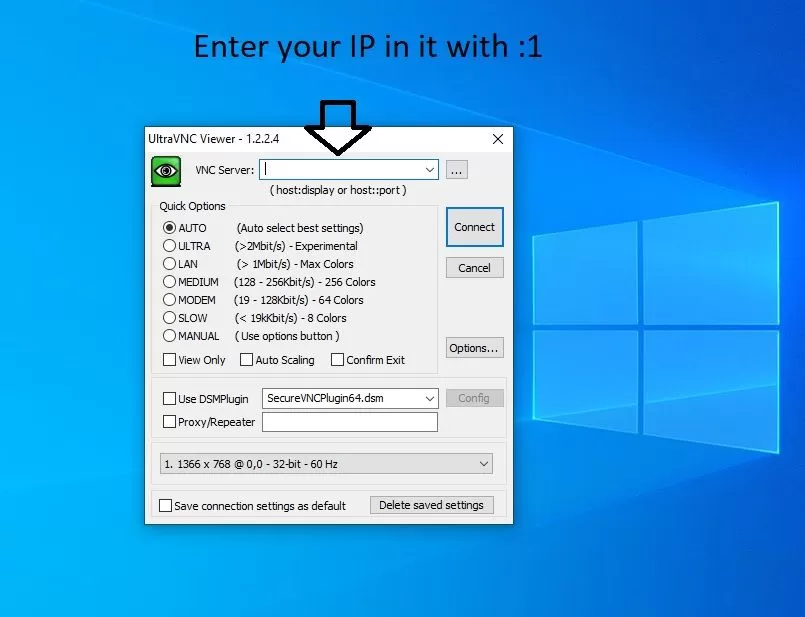
‼ ‼ ‼ After you entered the next input, you have a FEW SECONDS to open VNC, I recommend to start VNC already before you copy-paste this last action in PuTTY and prepare the ip (xxx.xxx.xxx.xxx:1) ‼ ‼ ‼
VNC Viewer
The same can be done with UltraVNC Viewer.
PuTTY step 4.
We need to run the correct input;
Copy to the terminal > PASTE with right mouse button!
SERVER 2019 SDA:
/tmp/qemu-system-x86_64 -net nic -net user,hostfwd=tcp::3389-:3389 -m 10000M -localtime -enable-kvm -cpu core2duo,+nx -smp 2 -usbdevice tablet -k en-us -cdrom /tmp/17763.737.190906-2324.rs5_release_svc_refresh_SERVER_EVAL_x64FRE_en-us_1.iso -hda /dev/sda -vnc :1 -boot d
SERVER 2019 NVMe:
/tmp/qemu-system-x86_64 -net nic -net user,hostfwd=tcp::3389-:3389 -m 10000M -localtime -enable-kvm -cpu core2duo,+nx -smp 2 -usbdevice tablet -k en-us -cdrom /tmp/17763.737.190906-2324.rs5_release_svc_refresh_SERVER_EVAL_x64FRE_en-us_1.iso -hda /dev/nvme0n1 -vnc :1 -boot d
SERVER 2022 SDA:
/tmp/qemu-system-x86_64 -net nic -net user,hostfwd=tcp::3389-:3389 -m 10000M -localtime -enable-kvm -cpu core2duo,+nx -smp 2 -usbdevice tablet -k en-us -cdrom /tmp/20348.169.210806-2348.fe_release_svc_refresh_SERVER_EVAL_x64FRE_en-us.iso -hda /dev/sda -vnc :1 -boot d
SERVER 2022 NVMe:
/tmp/qemu-system-x86_64 -net nic -net user,hostfwd=tcp::3389-:3389 -m 10000M -localtime -enable-kvm -cpu core2duo,+nx -smp 2 -usbdevice tablet -k en-us -cdrom /tmp/20348.169.210806-2348.fe_release_svc_refresh_SERVER_EVAL_x64FRE_en-us.iso -hda /dev/nvme0n1 -vnc :1 -boot d
Windows 10 ENT SDA:
/tmp/qemu-system-x86_64 -net nic -net user,hostfwd=tcp::3389-:3389 -m 10000M -localtime -enable-kvm -cpu core2duo,+nx -smp 2 -usbdevice tablet -k en-us -cdrom /tmp/17763.107.101029-1455.rs5_release_svc_refresh_CLIENT_LTSC_EVAL_x64FRE_en-us.iso -hda /dev/sda -vnc :1 -boot d
Windows 10 ENT NVMe:
/tmp/qemu-system-x86_64 -net nic -net user,hostfwd=tcp::3389-:3389 -m 10000M -localtime -enable-kvm -cpu core2duo,+nx -smp 2 -usbdevice tablet -k en-us -cdrom /tmp/17763.107.101029-1455.rs5_release_svc_refresh_CLIENT_LTSC_EVAL_x64FRE_en-us.iso -hda /dev/nvme0n1 -vnc :1 -boot d
Windows 10 x64 PRO SDA:
/tmp/qemu-system-x86_64 -net nic -net user,hostfwd=tcp::3389-:3389 -m 10000M -localtime -enable-kvm -cpu core2duo,+nx -smp 2 -usbdevice tablet -k en-us -cdrom /tmp/index.html?dl_id=140 -hda /dev/sda -vnc :1 -boot d
Windows 10 x64 PRO NVMe:
/tmp/qemu-system-x86_64 -net nic -net user,hostfwd=tcp::3389-:3389 -m 10000M -localtime -enable-kvm -cpu core2duo,+nx -smp 2 -usbdevice tablet -k en-us -cdrom /tmp/index.html?dl_id=140 -hda /dev/nvme0n1 -vnc :1 -boot d
Windows 10 22H2 x64 PRO NVMe:
/tmp/qemu-system-x86_64 -net nic -net user,hostfwd=tcp::3389-:3389 -m 10000M -localtime -enable-kvm -cpu core2duo,+nx -smp 2 -usbdevice tablet -k en-us -cdrom /tmp/index.html?dl_id=173 -hda /dev/nvme0n1 -vnc :1 -boot d
Windows 11 22H2 x64 PRO NVMe:
/tmp/qemu-system-x86_64 -net nic -net user,hostfwd=tcp::3389-:3389 -m 10000M -localtime -enable-kvm -cpu core2duo,+nx -smp 2 -usbdevice tablet -k en-us -cdrom /tmp/index.html?dl_id=168 -hda /dev/nvme0n1 -vnc :1 -boot d
Replace /tmp/WINDOWS.iso with your own windows.iso! And check if you have the right disks SDA or NVMe.
VNC Viewer
You can use
VNC Viewer
OR
UltraVNC
depending on your likings.
VNC Viewer
Troubleshoot
– Windows is stuck on installation? Repeat PuTTY step 1-4 and don’t install Windows again.
– Rescue in Buster, after do a RESET as show as in Step 05, and continue in webpage KVM.
Troubleshooting
CTRL + F10 It will open a CMD, insert these words, step by step.
diskpart
list disk
select disk 0
clean
convert mbr
exit
exit
Go back to the beginning of the installation, and restart the installation without reboot of the terminals.
Later you can change it back to GPT with a program in Windows or a LiveCD
Advice:
Install:
Teamviewer HOST
Install:
UltraVNC SERVER
Remote Desktop ON in Settings
And Energy Settings to NEVER
REBOOT one more time as shown in step 05.
Change the username and password.
My services?
Please keep in mind to contact me only from 9:00-21:00 AMS time.
要发表评论,您必须先登录。